
In this episode I’ll be telling you how easy it is to turn an old rubbish bin into a rainwater barrel to collect the runoff from your gutters and keep your garden lubricated!
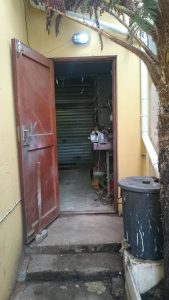
We have a long side garden that runs down the side of our home, between the back of the garage to the back of the greenhouse, and we don’t have a garden hose long enough to reach! I circumnavigated this little challenge by turning an old plastic rubbish bin into a water barrel.
I started by working out where the best place was to set it up. Near to a gutter down-pipe is best, because you will need to re-route the pipe to the top of the barrel. I also placed it on a higher level than the surrounding garden, to allow the water to flow along an irrigation line I planned to install along the length of the side garden itself.
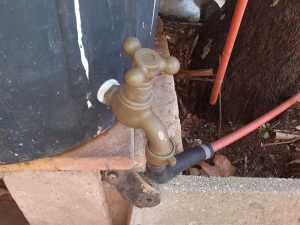
The top of a low garden wall was high enough, but not wide enough, so I compensated by placing a square cement flagstone on top of it, and supported it on the side with a few loose bricks. Ensuring it was level, I placed the bin on top of that and chose the right spot to fit a garden tap. The lower it is, the better, since once the water level falls below the tap, nothing more will come out. The hole was fairly easy to make using a large drill bit, which I then enlarged to the right size for the tap’s threaded pipe to fit tightly into, using a sharp craft knife. Once this was done, I secured it with the supplied plastic mounting nut and some plumber’s tape on the thread – and a pair of rubber gaskets to provide a good waterproof seal. No use making this if the water’s going to leak out, is it?
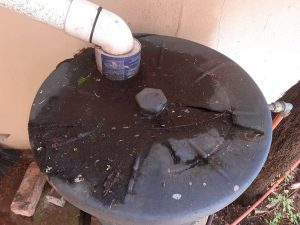
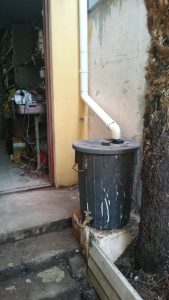
After a little testing using a few buckets of water and tilting the bin over to hold the tap at the bottom to see if there were any leaks, I was satisfied, and set the barrel in place on its platform. Then it was time to re-route the gutter down-pipe. Ours are PVC, so it was fairly easy. All I had to do was measure the places where I’d need to install elbows or joints, remove the pipe, cut at the places marked, and assemble the pipe again, with the elbows. You may need to fit a few extra wall mountings for the gutter pipe to support it on its new route to the bin, but as you can see in the photos, this wasn’t necessary in this case. The last section of pipe (higher than the top level of the barrel) is suspended in the air above it. Remember to put an elbow on the end facing down so that the water is guided into the barrel and doesn’t spray or splash over it.
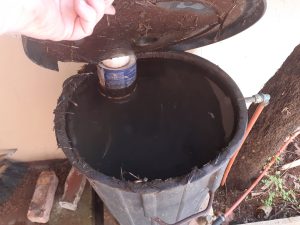
What I did next was to take the lid of the bin, and to mark the spot where the entry hole for the elbow was to be. I then cut the hole with an old (but sharp!!) steak knife! As you can see in the accompanying photos, the last downward facing elbow channeled the water where it had to go, but it wasn’t enough to seal it from bugs, leaves and dust – so soon afterwards, I improvised a solution. I used an empty 1 liter plastic paint tin for this purpose, and cut a hole to match the bottom lip of the elbow and fitted it tightly over that – the tin is the same circumference as the hole in the lid, which helps keep the water inside fairly clean and free of floating bug carcasses and vegetable matter!
To prevent over-filling (which did happen very quickly, surprisingly enough!) I installed a brass 90 degree elbow joint near the top edge of the barrel, with a half-meter length of plastic water pipe attached, which ensures that any excess water runs off in a controlled manner and ends up in the garden and not all over the cement path!
Connected to the tap is our simple irrigation system, which consists of a length of plastic water pipe and several lengths of PVC electrical tubing with small holes drilled at intervals. Watering of the side garden takes place every weekend in summer (or whenever I remember, to be honest). It seems that even dew that forms on the roof and runs along the gutter system lands in the barrel, so it stays full and doesn’t take long to refill again, after use.
Well that’s all for this week! Have a DIY day!
Pictures included! Enjoy!
Cheers! 


