
One of the problems when having one or more pets, is when they have to go “outie” in the middle of the night! In these dangerous times when we can’t afford to leave doors open through the night, this is exactly the sort of solution you need!
I first realized the need for a pet door in our kitchen door some years back, and at first looked around for off-the-shelf units, but to be honest, the prices of the items available – in the thousands of rands (essentially for a hole in the door!) – were shocking enough to inspire me to come up with a DIY alternative! Holy crap!
I decided to make a circular door in the lower half of the kitchen’s stable door, but more than just bashing a hole through it, I wanted something that could be closed and locked if we needed it to, and which wouldn’t leak if it rained etc.
I started by taking the lower half of the door off, which was easy enough – all I had to do was unscrew the hinges from the door frame. I then placed the loose door on my workbench and decided on a good spot for the opening, and using a dinner plate as a template, placed it on the spot and drew around the edges with a marker pen. Keep in mind that you need to do this on the INSIDE of the door, and not on the side facing outside.
Once this was done, I located my jig saw and set the guide plate at 45 degrees so that it would cut at a 45 degree angle. Then I put a 10mm wood drill bit into my drill and placed it inside the circle, close to the line but not ON the line. About 2 or 3 cm will do. Then I drilled through both sides of the door (bearing in mind the door is hollow) I then placed the jig saw blade into the hole – and this is important to note, you need to keep in mind which direction the blade is leaning towards – otherwise this is going to be a mess! The point of tilting the guide plate is so that when you cut the door, it will cut the edges in such a way that there is an angle to it – larger on the inside than on the outside, so that the door will open inwards.
I tried to stick to the line when cutting the circumference of the door, bearing in mind that I needed to place the door on some bricks or other objects to keep the blade from striking my workbench, which could also damage the machine!
Once I’d got the circular door out, it was time to neaten up the edges of the door AND the edges of the opening. I did this by trimming away at uneven bits and regularly checking for fit. Hollows, chips and gaps were filled with wall filler – I know, not exactly wood filler, but it works just as well for this purpose!
When it was all smoothed out and neat, I placed the circular door in the opening loosely, to orient the planks so that they matched up with those of the door, and then fitted the hinge. I chose to put our hinge on the right hand side, and once I was satisfied that it opened and closed properly, I fitted a sliding bolt to the left side so the door could be closed and bolted when desired.
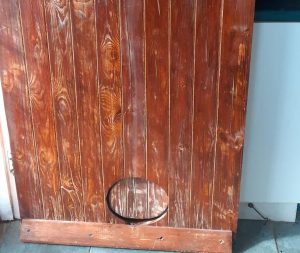
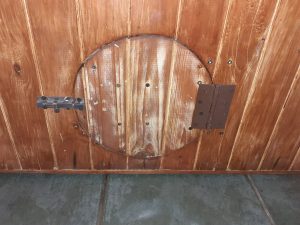
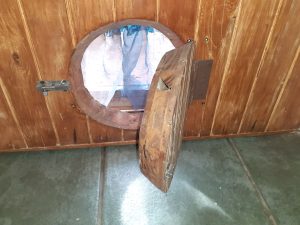
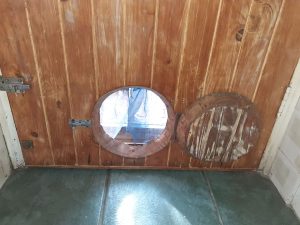
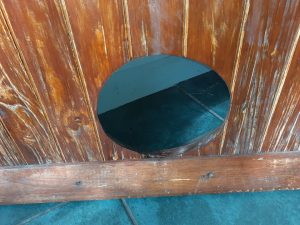
A nice coat of varnish to the edges of the door and the opening made it all look good as new! The last thing I did (before refitting the bottom part of the door to the frame) was to install a length of thin adhesive rubber strip around the inside of the opening to act as a weather seal.
There you go! No more late night or early morning calls from kitties to go outside!
Pictures included – enjoy!
Have a DIY day!
Cheers! 


