
Today, in this 70th episode of Easy DIY, I’ll be showing you how I made a center console for my VW Beetle – and how you can too!
There are numerous reasons why someone might want to do this – but for me it was to avoid making holes in the pristine original dashboard of my 1962 VW! An add-on panel underneath the dashboard to hold additional switchgear for intermittent wiper upgrades, USB power ports and the like, it seemed the logical answer to the question of “where the hell do I put all this stuff?!”
My earlier attempt from 2015 when I first acquired Dolly (my bug’s name) was a plain aluminum bracket which I’d painted the same color as the body and stuck underneath the dash above the parcel tray that came with the car. This worked well for a while, but as Dolly stepped up to be my daily driver, I added a few extra creature comforts which needed more switches! I began to run out of space to mount them all! The USB power hub I installed took up most of the space, so it was time for a rethink and to plan a better solution!
There are plenty of larger consoles being built for Beetles in custom shops and the like, but I wanted something stylish that if possible looked like it originally came with the car, or was possibly built for it by a custom shop when it was new! That said, I didn’t want something that looked out of period, or out of place – it had to compliment the car, not make it look like some soulless yob had got hold of it!
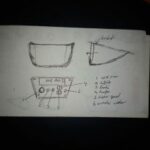
After sketching out what I had in mind, I figured out how to make it a reality. Making this console took me almost a whole day in the workshop! The materials I used included off-cut wood and the metal of an old coffee tin (the largest one available). The tin had corrugations in the side, which I planned to use to good effect for decoration. I also decided to secure it underneath the dash using double-sided tape in order to avoid having to drill any more holes in the steel of the car! The best part about this is, if one day I decided to remove it, it wouldn’t leave any scars under the dash!
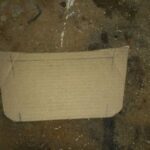
I cut a piece of cardboard a bit larger than I wanted the front profile of the console to be, and then went into the garage armed with a marker pen, scissors and a craft knife. Sitting in the car, I held the top edge of the cardboard against the underside of the dash where I wanted the console to be, and carefully marked the top edge and then cut it according to the profile of the curves underneath the dash. I did this until I was satisfied with the fit, working to achieve no gaps or uneven spots. This done, I also marked the cardboard where I wanted the bottom edge of the console to be – in this case, just above where it would meet the parcel tray which was underneath it.
Back in the workshop, I used the marker to draw the outline of the profile of the dash on the cardboard, so that – once cut – I could use it as a template to shape the wood frame on. I also made several trips back and forth between garage and workshop just to check the profile of the template against the dash to avoid later disappointment.
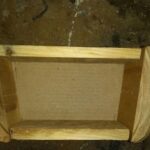
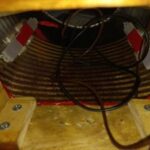
Once satisfied with the template, I chose four likely looking pieces of offcut wood, which I then proceeded to shape according to the template. I used my bench grinder to shape the edges and a belt sander to smooth the surfaces afterward. After that I glued, nailed and screwed the panels together, taking care to predrill nail holes in case of brittleness. I constantly referred to the template as you can see in the photos, ensuring that it didn’t distort during the assembly process, so that it remained true to the profile I desired.
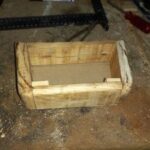
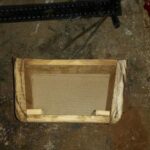
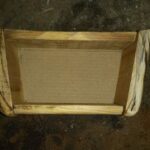
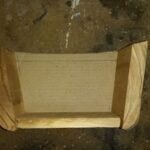
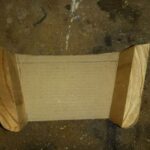
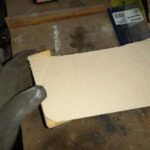
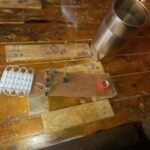
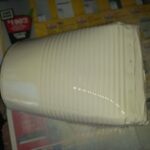
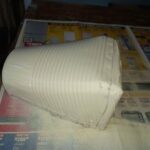
After that, it was time to add the cowling which would be made from the coffee can. I felt that once painted in the same color as the car’s body, it would look like it belonged there! Anyway, the first thing I had to do was to cut out the bottom circle of the can, and then the top rim, and then right down the side join. Rather than spread it out and flattening it, I opted to use the curve of the can to greatest effect in the final design! I also left the stiffening ridge at the bottom to stiffen the rear lip of the cowling to keep its shape, and also to not risk cutting myself while feeding wires through the back end to the front!
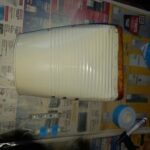
In order to make the cowling fit properly, I first had to measure its dimensions – and to do that I had to make another template. This time using newspaper flattened out on a worktable, I placed the wooden fascia frame against the edge of the paper upside down (i.e. the part that would attach to under the dash) and then gauged how long the cowling would need to be. Then using a ruler, I marked out the approximate dimensions on that paper of the area the cowling needed to cover. That was the first part – the second part was having to make a paper template of the cowling which fitted over the wood frame and covered that drawn area on the paper template. After that, I was ready to mark the tin itself.
Using the bottom lip as the guide for the rear lip of the cowling, I placed the cut-out cowling template against it, and then marked the tin around it for where I had to cut. Then I cut the tin with a pair of tin-snips – the same ones I’d used to prepare the tin earlier. Once this was done, I used a combination of small screws and a nail-gun to secure the cowling around the lip of the frame. The corners needed a little slight tapping with a small hammer to flatten against the wood.
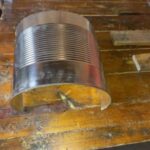
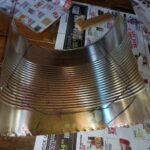
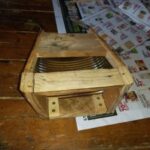
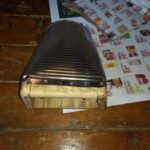
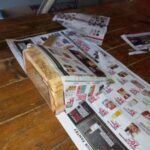
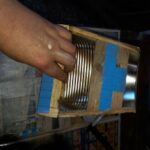
After this, I added some more wood for stability, and also to help secure the rear of the console to the underside of the dash later with double-sided tape, securing the wood with screws.
The next thing I needed to do in the workshop was to make a panel for the front which would cover the opening and hold the switches I planned to fit! I used a piece of Masonite or wood pressboard for the task, shaping it to size using the bench grinder. This material is pretty difficult to work with in that it flares and fluffs out on the edges of holes or where it’s been cut, and so it was crucial to achieve a smooth finish! I drilled four mounting holes, one at each corner, and used hexagonal drive screws just slightly larger than the holes to secure the panel.
Once done, I spray painted the panel with matt black paint.
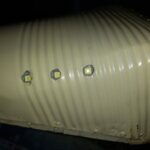
Then it was time to paint the cowling, and three quick coats (of quick-drying aerosol spray paint) did the trick. While it was drying, I applied a coat of the same lovely dark varnish I used recently on my sewing machine table project to the wooden front end. I planned to give it another coat later on, in the car. Of course, it was once I’d finished with the paint and varnish that I realized I’d forgotten to drill holes for the LED lights I planned to fit! Oh calamity! Still, it wasn’t the end of the world – I still managed to do it!
Once dry enough to handle, I drilled holes slightly larger than the LEDs I was fitting, spaced exactly the same width apart in the side curves of the cowling. They matched up perfectly! Then I stuck them inside using bits of double-sided tape and completed the wiring so I could connect them up later. I added the double-sided tape to the mounting points which would fit underneath the dash.

Then I had to mount the switches in the front panel, which I did by deciding where I wanted them on the panel, and then carefully making the necessary holes to mount them. I finished the edges of the holes off with a craft knife and small craft files and fitted them.
This done, it was time to relocate myself, some tools, and the complete console to the garage!
Sitting inside the car, I test-fitted the console to its intended location and was pleased to see that it fitted perfectly. I then practiced placing and fitting it a few times – and this may seem silly until you realize that working with double-sided tape makes putting something in the wrong place very easy, and removing it very unpleasant! Once I was sure I knew exactly where and how to place the console, I peeled off the sealing strips from the double-sided tape and fitted the console perfectly in place.
After that all I had to do was to feed the bundle of wires through the back of the cowling and connect them up to their switches – which can be a heck of a job if you don’t remember where they’re supposed to go! I recommend taking photos of the wiring layout, or making a sketch or notes before taking it apart. This will help you in ways you probably don’t realize!
All sealed up and connected, the accessory console looks rather nice I think, and it makes using the car feel so much more comfortable, easy and stylish than before – in any case, it’s not bad considering this is the first time I’ve made something like this!
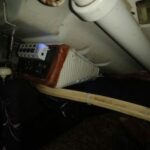
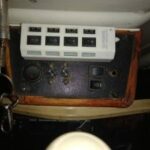
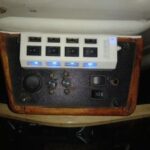
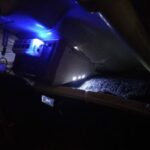
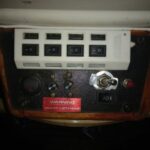
To give you a quick tour of the control console, the USB power hub is the white block at the top center. Below it, from left to right, is an additional ignition switch, then the switch for the lights in the console and power to the USB hub. Next to that is a power switch for the sound system mounted in a steel box, cunningly sprayed matt black underneath the parcel tray to reduce its visibility! (I’ll probably do an article on that later at some point, although I lost the photos I took during its construction.) Beside that, the chrome toggle switch is the horn selector switch, which allows me to select between Dolly’s two different hooters. Under that is the intermittent wiper speed selector switch, and to the right of those, the little red button is the windscreen washer activator.
In case you’re wondering about the little red sign stuck at the bottom which reads: “WARNING! ENEMY LISTENING!“, I found it while cleaning out my workshop on Sunday, and when I saw it I thought “well I’m sure that would look really spiffy somewhere on the console!” It’s a small anodized metal tag I got many years ago from a friend, which supposedly came off an antique military radio from the 1970s. I think it adds a nice quaint touch! (Let’s hope they are – it’ll make ’em jealous!) 
Things I still need to do on this project? Well, perhaps a second coat of varnish on the wood face would make it shinier – and I’m tempted to paint the USB hub black to match the panel behind it, but I think that’s about it! If I do, I’ll update the article with fresh images!
Meanwhile, pictures included – enjoy!
Have an innovative DIY week!
Cheers! 


